 Save
Save My kitchen smelled like melted chocolate and pure chaos the first time I attempted a festive board for St. Patrick's Day. I'd bought way too many ingredients, scattered them across every available counter, and my partner walked in asking if I was opening a candy store. But then something clicked—instead of stressing about perfection, I just started arranging everything by color, and suddenly this magical platter came together that had everyone reaching for it before dinner was even served. That's when I realized a treats board isn't about precision; it's about abundance and fun.
I made this for a small St. Patrick's Day gathering last year, and what I didn't expect was how it became the thing people talked about most. Someone's kid literally said, "This is better than candy store shopping," while my friend kept saying the combination of textures reminded her why she loves snacking more than actual meals. That's when I understood—a treats board works because it gives everyone permission to graze exactly how they want, no judging, no portion control, just pure joy.
Ingredients
- White chocolate chips or candy melts: Use the good stuff if you can—cheaper brands sometimes taste waxy, and at 14 ounces, the quality really matters here.
- Lucky Charms cereal: If you separate the marshmallows first, you get more control over the bark's texture, but honestly, I've done it both ways and both taste amazing.
- Green candy melts: These are optional but make the whole thing feel intentionally festive rather than just accidentally St. Patrick's Day colored.
- Mini pretzels: The salt against the sweet is what makes people keep eating, so don't skip these even if you think you have too much already.
- Green grapes and apple slices: These feel healthy and add freshness that balances out all the chocolate and candy—it's your board's secret genius move.
- Gold-wrapped chocolate coins: They're nostalgic and actually delicious, plus they literally look like leprechaun treasure on your platter.
- Pistachios or mixed nuts: Grab the roasted, salted ones; they're worth the extra dollar and make the board feel sophisticated somehow.
- Shortbread cookies and rainbow candies: Mix textures constantly—soft, crunchy, chewy, smooth—keeps the eating experience interesting from first reach to last bite.
Tired of Takeout? 🥡
Get 10 meals you can make faster than delivery arrives. Seriously.
One email. No spam. Unsubscribe anytime.
Instructions
- Prepare your bark stage:
- Line a baking sheet with parchment paper so cleanup is effortless later. This one small step saves you from scrubbing chocolate off your good pan, which is worth remembering the next time you're tempted to skip prep work.
- Melt the white chocolate gently:
- Use a microwave-safe bowl and work in 20-second bursts, stirring between each one—this keeps the chocolate smooth instead of seized and grainy. You'll know it's ready when there are just a few small lumps that disappear with stirring.
- Spread it thin and even:
- Pour the melted chocolate onto your parchment and spread it to about a quarter-inch thickness using a spatula or the back of a spoon. Don't overthink this; slight ripples actually look rustic and charming.
- Load up with Lucky Charms:
- Sprinkle the cereal (and marshmallows if you want them scattered throughout) evenly over the chocolate while it's still warm and slightly sticky. The warm chocolate will grab onto the cereal and hold it in place.
- Add your finishing touches:
- If you're using green candy melts, melt them separately and drizzle them across the bark in thin lines, then dust with green sprinkles or edible glitter. Let it set at room temperature for about 30 minutes or speed things up in the refrigerator.
- Break and arrange:
- Once completely firm, break the bark into shards of various sizes and position it as the star of your board. The irregular pieces look more appealing and invite people to grab one.
- Build your board around the bark:
- Start by placing the bark pieces in a focal spot, then arrange everything else around it, grouping similar colors and shapes so your platter looks intentional. Don't stress about symmetry; organic arrangement actually looks more inviting.
- Serve fresh or chill:
- This board is best served within a few hours of assembly, though you can cover it and refrigerate it for up to 4 hours before your guests arrive. Just let it sit out for 10 minutes before serving so the chocolate melts slightly on people's tongues.
 Save
Save There's something magical about watching people's faces when they see a treats board in person instead of just a photo. The abundance, the colors, the permission to eat anything and everything—it transforms a regular gathering into something that feels a little bit special. That's the real magic here, even more than the Lucky Charms bark.
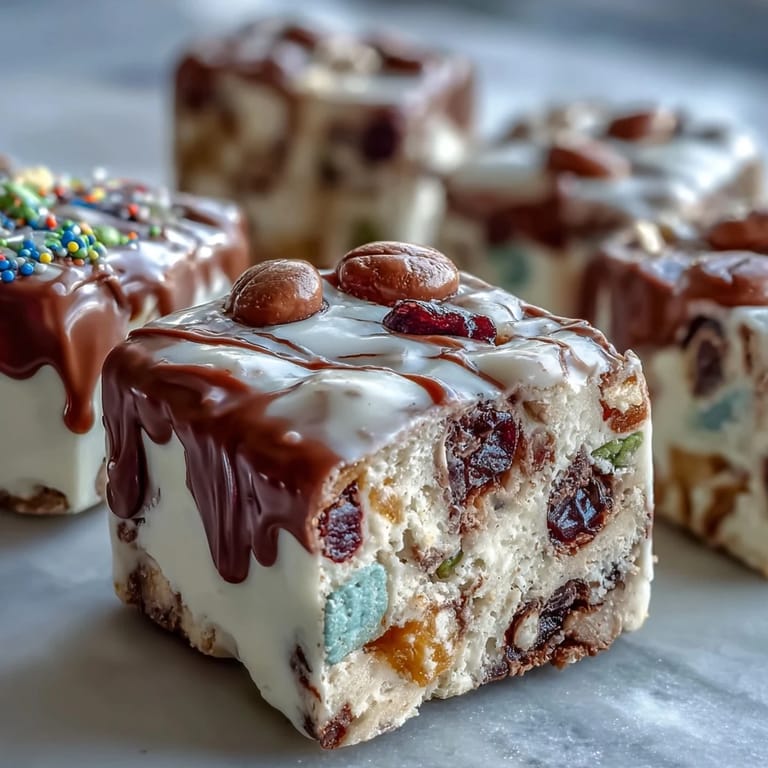
The Art of Bark Making
Bark is honestly one of the most forgiving things you can make, which is probably why I keep coming back to it. The texture doesn't need to be perfect, the thickness doesn't matter as long as it sets, and you can literally throw anything on top that sounds good. I've learned that the key is getting the chocolate temperature right and not overthinking the decoration phase—sometimes the best-looking barks are the ones where you just go with your instinct and stop yourself from fiddling with it.
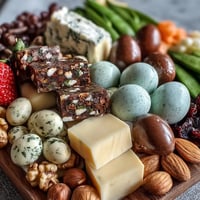
Building a Board That Actually Gets Eaten
The secret to a treats board that disappears is variety in every way—flavors, textures, colors, temperatures. You want people to find something exciting every time they reach for something different. I've noticed that mixing sweet with salty, soft with crunchy, and chocolate with fruit keeps people coming back longer than a board with all similar items. Grouping by color makes it look intentional, but the real trick is making sure there's something for everyone, whether they want chocolate, fruit, salty snacks, or just pure sugar.
Making This Completely Your Own
The beauty of this board is that it's just a framework—you can swap anything out based on what you love, what's in season, or what's on sale at your store. I've made versions with mint chocolate instead of white chocolate, added green-tinted popcorn for crunch, and swapped the Lucky Charms for crushed candy canes when I didn't have cereal. The spirit stays the same; it's just about creating abundance and color on a platter that makes people happy when they look at it.
- Keep chocolate coins in the pantry year-round because they're festive on any board and kids genuinely get excited to find them.
- If you're making this ahead, assemble the board components first and add the bark pieces last so the chocolate stays crisp and snappy.
- Use a large, flat platter or wooden board instead of a small plate—visual abundance is half the appeal of treats boards.
 Save
Save There's no complicated recipe or advanced technique here, just good ingredients arranged with intention and care. That simplicity is exactly why this board works so well for celebrations—it looks like you've done something impressive while leaving you time to actually enjoy your guests.
Recipe FAQs
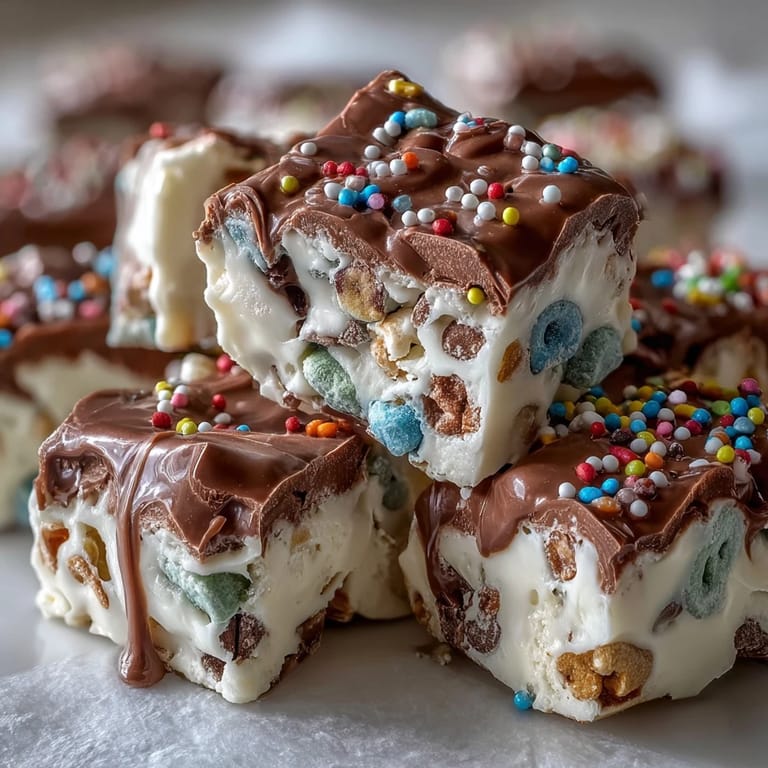
- → How do I make the Lucky Charms bark?
Melt white chocolate chips and spread onto parchment paper. Sprinkle cereal and marshmallows on top, then drizzle with green candy melts and add sprinkles. Let set until firm, then break into pieces.
- → Can I prepare the treats board in advance?
Yes, assemble the bark and other components up to a day ahead. Keep refrigerated and cover until ready to serve for optimal freshness.
- → What are some good snack substitutes for nuts on the board?
You can replace nuts with extra pretzels, popcorn, or seed-based snacks to accommodate allergies while keeping variety.
- → How do I keep the bark from melting during assembly?
Ensure the white chocolate is fully set before assembling the board. Refrigerate to firm up if needed and assemble in a cool environment.
- → What drinks pair well with this festive treats board?
Consider Irish coffee, hot chocolate, or sparkling cider to complement the sweet and crunchy flavors on the board.