 Save
Save My neighbor knocked on the kitchen window mid-afternoon on the Fourth, asking if I had any ideas for a dessert that wouldn't require firing up the grill again. The heat had been relentless all day, and honestly, I was done with the outdoor cooking carousel. That's when it hit me—why not bring the campfire indoors, at least for the sweet finale? Cast iron, chocolate, marshmallows, the whole nostalgic mess melted together in twenty minutes. It became the thing everyone asked about before they'd even touched the hot dogs.
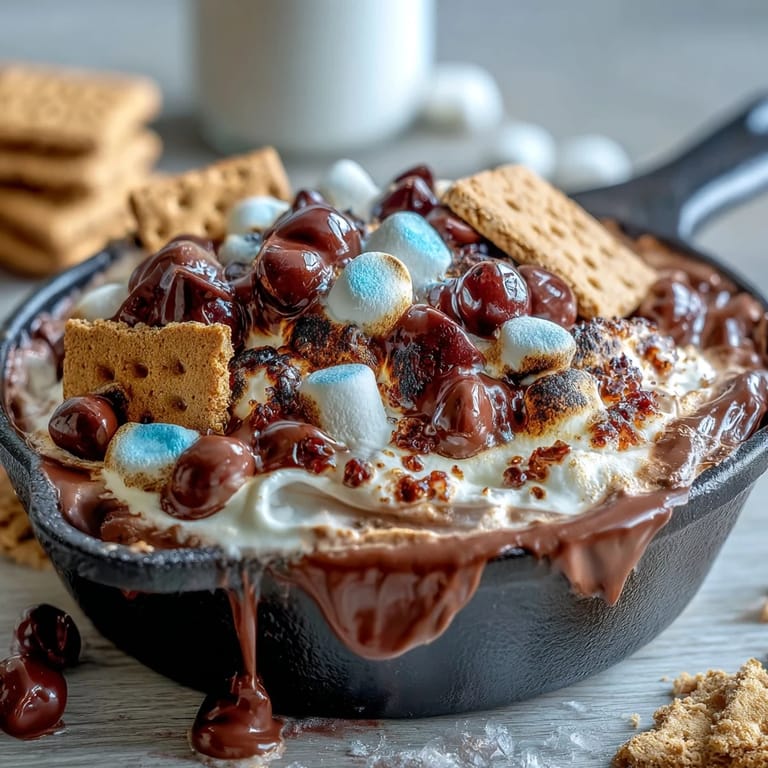
I'll never forget watching my eight-year-old niece's eyes light up when she pulled that skillet out of the oven and saw the marshmallows blistered golden on top, the chocolate peeking through underneath like edible treasure. She didn't even wait the full three minutes to cool before dunking a graham cracker in, burning her finger slightly, laughing anyway because the taste was worth it. That moment—messy, unfiltered joy—is exactly why I keep making this.
Ingredients
- Semi-sweet chocolate chips (2 cups): The base that holds everything together; semi-sweet keeps the dip from turning into pure sweetness overload, and the chips melt more evenly than chopped chocolate.
- Unsalted butter (1 tablespoon): A small amount smooths out the chocolate and helps it meld with the marshmallows above, creating that cohesive layer.
- Large marshmallows (3 cups): These need to be the bigger kind so they toast rather than disappear; smaller ones burn before they brown properly.
- Graham crackers (16, broken into pieces): Your delivery system, and breaking them by hand instead of cutting feels more intentional, more casual.
- Red, white, and blue chocolate candies (1/4 cup, optional): The finishing touch that signals you actually planned this for the holiday; totally optional but they melt into the warm marshmallows beautifully.
- Strawberries and blueberries (1 cup each, sliced and optional): Fresh fruit cuts through the richness and adds tartness; they're a game-changer if you want to feel slightly less indulgent.
Tired of Takeout? 🥡
Get 10 meals you can make faster than delivery arrives. Seriously.
One email. No spam. Unsubscribe anytime.
Instructions
- Get your oven ready:
- Preheat to 400°F while you grab your cast iron skillet—that temperature is high enough to toast marshmallows quickly without burning them. Let the skillet warm up in the oven for a minute or two if it's been sitting cold.
- Build the chocolate foundation:
- Drop the chocolate chips and butter into your dry skillet and slide it into the oven for 3 to 4 minutes. You're looking for that moment when the chips start to lose their shape but haven't turned into a full puddle yet.
- Stir it smooth:
- Pull the skillet out carefully—use oven mitts because cast iron doesn't forgive—and stir the chocolate and butter together until there are no streaks. It should look silky and unified.
- Blanket with marshmallows:
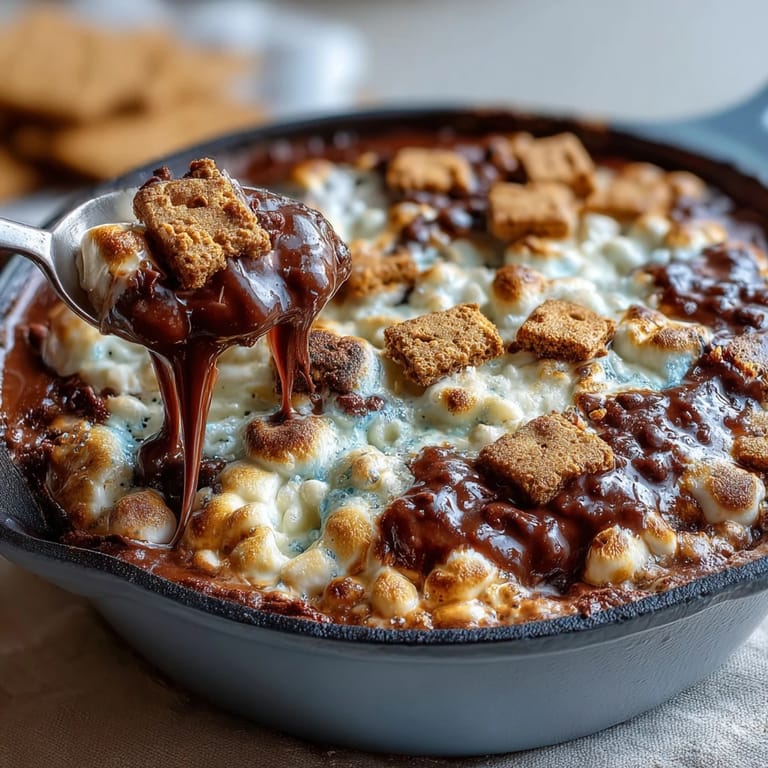
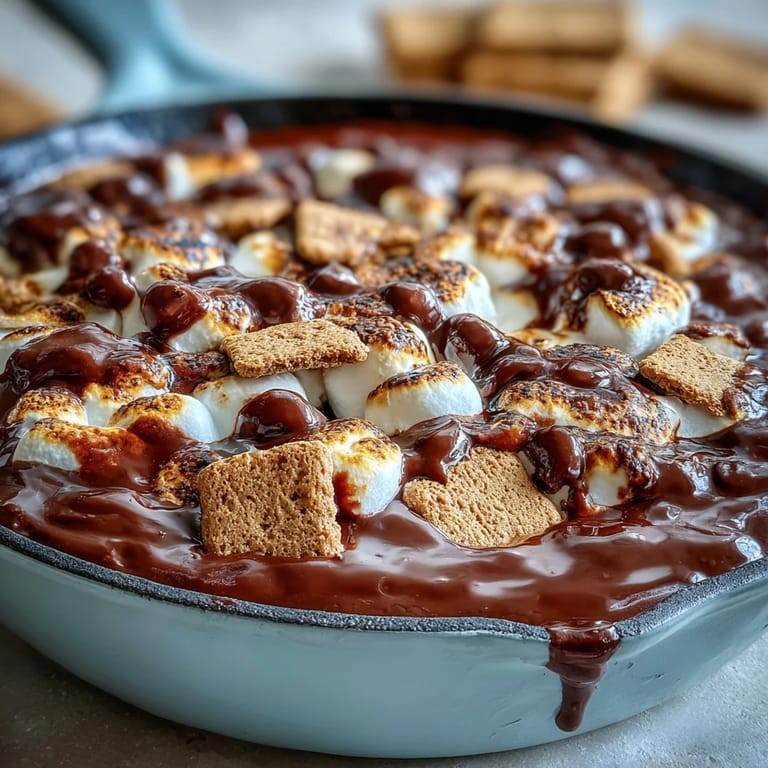
- Arrange the marshmallows in a single layer over the warm chocolate, pressing them down just slightly so they nestle in and don't slide around. Cover as much surface as you can so they toast evenly.
- Toast until golden:
- Back into the oven for 5 to 7 minutes, watching through the window if you can because marshmallows go from perfect to overdone in about forty seconds flat. You want the tops blistered and golden, almost like s'mores at the campfire.
- Add festive flair (if you're feeling it):
- Sprinkle those patriotic candies over the warm marshmallows if you're using them, and let them sink slightly into the heat.
- Rest and serve:
- Let everything cool for 3 to 5 minutes so you can handle the skillet without burning your mouth, but not so long that the chocolate hardens. Serve warm with graham crackers for dipping, and those berries if you've got them.
 Save
Save There's something oddly comforting about serving food that's still bubbling and hot from the oven on the hottest day of summer, especially when people gather around one skillet like it's actually a campfire. This dip became less about the dessert itself and more about everyone slowing down for five minutes, laughing at each other's marshmallow-covered faces, and tasting something that felt both impossibly simple and somehow celebratory.
Cast Iron is Your Secret Weapon
Cast iron holds heat like nothing else, which means your chocolate stays melty and your marshmallows toast evenly across the whole surface. It also looks beautiful on the table—there's something about serving straight from cast iron that makes casual dessert feel a little more intentional. If you don't have a 10-inch skillet, an 8-inch works but you'll need slightly fewer marshmallows, and a 12-inch means you might need a few more to cover the chocolate adequately.
Flavor Additions That Actually Work
One year I drizzled a thin line of peanut butter over the chocolate before adding marshmallows, and it transformed the whole thing into something deeper and more complex. Sea salt sprinkled on top of the melted chocolate adds this sophisticated edge that makes people pause and ask what that flavor is. Even a dusting of cinnamon or a teaspoon of vanilla extract stirred into the melted chocolate shifts the whole vibe from pure nostalgia to something more refined.
Timing and Temperature Matter
The oven temperature might seem high, but 400°F is what gets those marshmallows golden and toasted instead of just melted and pale. If your oven runs hot (and most do), start checking at the 5-minute mark for the marshmallow phase. The whole cook time is truly just twenty minutes from cold skillet to fully assembled dip, which is partly why this became my go-to last-minute dessert.
- If marshmallows start browning too fast, lower the oven to 375°F for the second baking phase.
- Don't preheat the skillet separately; it'll be plenty hot by the time you add chocolate.
- Have your graham crackers and fruit prepped and waiting so you can dive in the moment it's ready to serve.
 Save
Save This dip proved that sometimes the most memorable desserts are the ones that look effortless and taste like comfort, all while bringing people together for those rare moments when everyone actually pauses to enjoy something sweet. Make it once and you'll find yourself reaching for that cast iron every summer.
Recipe FAQs
- → What type of chocolate works best for this dish?
Semi-sweet chocolate chips provide a balanced sweetness and melt smoothly, making them ideal for layering under the marshmallows.
- → Can I use a pan other than cast iron?
While cast iron retains heat evenly and enhances the toasted marshmallow texture, any oven-safe skillet can be used if cast iron isn't available.
- → How do I know when the marshmallows are perfectly toasted?
Watch for a golden brown color on the marshmallow tops after baking for about 5 to 7 minutes at 400°F.
- → What are good dippers to serve with this dish?
Graham crackers are traditional dippers, but fresh strawberries and blueberries also complement the sweet, melty layers nicely.
- → Can I customize the topping for festive occasions?
Add colored chocolate candies or sprinkles on top before serving to match specific holidays or themes.