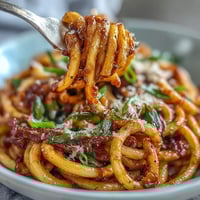
 Save
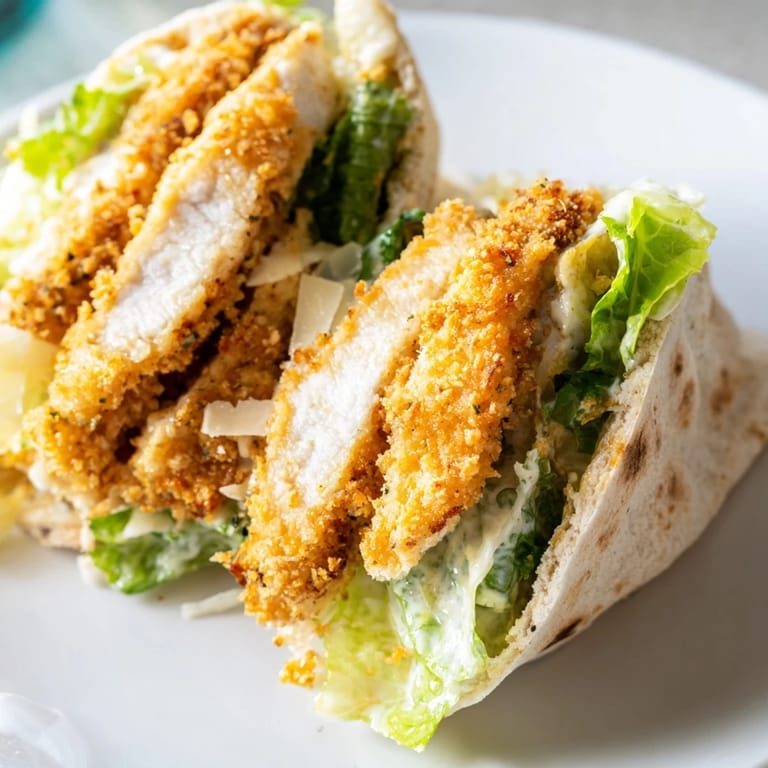
Save The smell of parmesan and herbs hitting hot panko breadcrumbs still takes me back to my first apartment kitchen, where I discovered that comfort food could be crispy and fresh all at once. My roommate walked in mid-cooking and demanded to know what bakery I'd secretly visited. That was the moment this recipe became a permanent resident in our weekly rotation.
Last summer, I made these for a crowd of skeptical friends who claimed they didnt like Caesar anything. Watching them reach for seconds, third helpings really, while debating whether to add bacon or avocado next time. Theres something about sliding warm pita bread into the oven that makes people gather around the kitchen island.
Ingredients
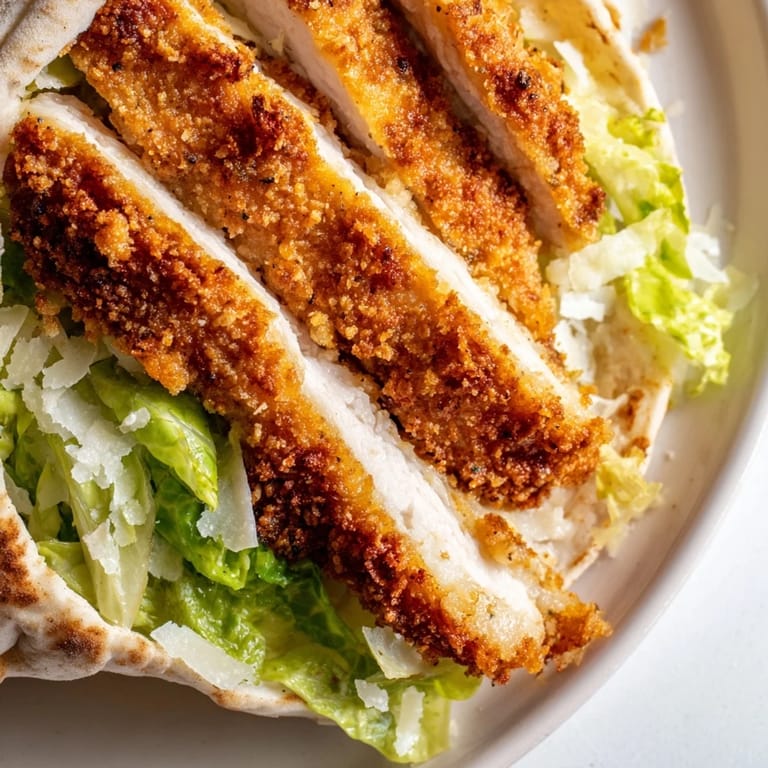
- 2 large boneless skinless chicken breasts: Slice them horizontally before you start anything else this creates 4 thinner cutlets that cook evenly and fit perfectly inside pita pockets
- 1 cup panko breadcrumbs: Japanese-style breadcrumbs create that irresistible shattering crunch that regular breadcrumbs just cant match
- 1/2 cup grated Parmesan cheese: Use the wedge you grate yourself rather than pre-shredded for better melting and a sharper punch of flavor
- 1 tablespoon chopped fresh parsley: Adds a bright herbal note that cuts through the rich parmesan and dressing
- 1 teaspoon dried oregano: Earthy and aromatic this is what makes the coating taste like something from an Italian kitchen
- 1 teaspoon dried basil: Sweet and peppery it balances the oregano and adds depth to the herb mixture
- 1/2 teaspoon garlic powder: Distributes evenly through the coating unlike fresh garlic which can burn and turn bitter
- 1/2 cup all-purpose flour: The first stop in your breading station creating the dry base that helps the egg mixture adhere
- 2 large eggs: Beat them with milk for a richer wash that acts as the perfect glue for your panko crust
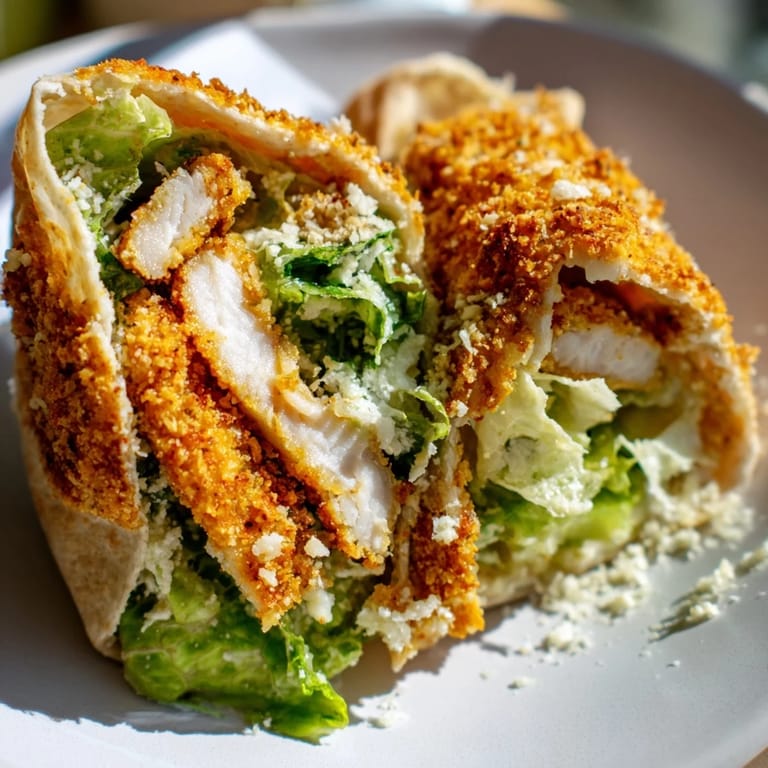
- 4 cups chopped romaine lettuce: Tear the leaves by hand rather than cutting them to avoid bruising and browning edges
- 1/3 cup Caesar dressing: Homemade or store-bought works but toss the lettuce gently to coat every leaf without wilting it
- 4 large pita breads: Warm them before filling so theyre pliable and less likely to crack when you stuff them
Tired of Takeout? 🥡
Get 10 meals you can make faster than delivery arrives. Seriously.
One email. No spam. Unsubscribe anytime.
Instructions
- Slice your chicken strategically:
- Cut each breast horizontally through the middle like youre opening a book to create two thin cutlets from each piece
- Set up your breading assembly line:
- Arrange three shallow bowls in order flour first then whisked eggs with milk and finally the panko-parmesan-herb mixture
- Coat with confidence:
- Press each cutlet firmly into the panko mixture to help the crust adhere better and create those gorgeous crispy ridges
- Sizzle to golden perfection:
- Cook about 3-4 minutes per side until the coating is deep golden-brown and the chicken feels firm when pressed
- Warm your pitas:
- A quick 1-2 minutes in a dry skillet makes them flexible and ready to accept all that delicious filling
- Bring it all together:
- Cut each pita in half stuff with dressed romaine then tuck in those sliced chicken strips while everythings still warm
 Save
Save My teenage nephew who survives on chicken nuggets asked for this recipe after just one bite. Watching him carefully assemble his own pita exactly how he liked it reminded me why I started cooking in the first place those moments when food becomes a conversation.
Making It Your Own
The beauty of this recipe lies in how easily it adapts to whatever youre craving or have on hand. Sometimes I swap the chicken for thin-sliced pork cutlets or use whole wheat pitas when I want something that feels more substantial.
The Caesar Factor
Not everyone loves anchovies in their dressing and thats perfectly fine. A good quality store-bought dressing works beautifully here though whisking a bit of lemon juice into whichever one you choose adds brightness that cuts through the crispy chicken.
Serving Strategy
These pitas are wonderfully portable which means theyve become my go-to for everything from weeknight dinners to casual weekend lunches. I like to set everything out family-style and let people build their own just the way they like them.
- Have extra lemon wedges ready for that final bright squeeze
- Keep the components separate if packing for lunch to prevent sogginess
- Warm the pitas again briefly before serving leftovers
 Save
Save Theres something deeply satisfying about crunching through that herbed crust into warm tender chicken while cool crisp romaine provides the perfect contrast. Maybe thats why this recipe has survived every attempt at kitchen decluttering.
Recipe FAQs
- → How do I keep the chicken crispy after cooking?
Transfer the cooked chicken to a paper towel-lined plate immediately after frying to absorb excess oil. This prevents moisture from softening the crust. Assemble the pitas just before serving for maximum crispness.
- → Can I prepare the chicken ahead of time?
Yes, you can bread the chicken cutlets up to 4 hours in advance and refrigerate them. Cook just before serving for the crispiest texture, or reheat in a 375°F oven for 8-10 minutes if prepared earlier in the day.
- → What's the best way to warm pita bread?
Warm pitas in a dry skillet over medium heat for 1-2 minutes, flipping halfway through, until soft and pliable. Alternatively, wrap them in foil and warm in a 350°F oven for 5-7 minutes. This makes them easier to fill without tearing.
- → How can I make this lighter without sacrificing flavor?
Substitute pan-seared or grilled chicken for the breaded version. You can also use Greek yogurt-based Caesar dressing instead of traditional creamy versions, and add extra vegetables like cucumber or bell peppers to bulk up the filling.
- → What ingredients can I swap for dietary restrictions?
Use gluten-free panko and flour for a gluten-free version. Replace regular pitas with whole-wheat or cauliflower-based alternatives. Dairy-free Caesar dressing works well, and you can substitute the Parmesan with nutritional yeast for a plant-based option.
- → How long will leftovers keep?
Store cooked chicken in an airtight container for up to 3 days. Keep salad components separate and assemble fresh when ready to eat. The prepared salad without dressing can be refrigerated for 1-2 days before the lettuce wilts.