 Save
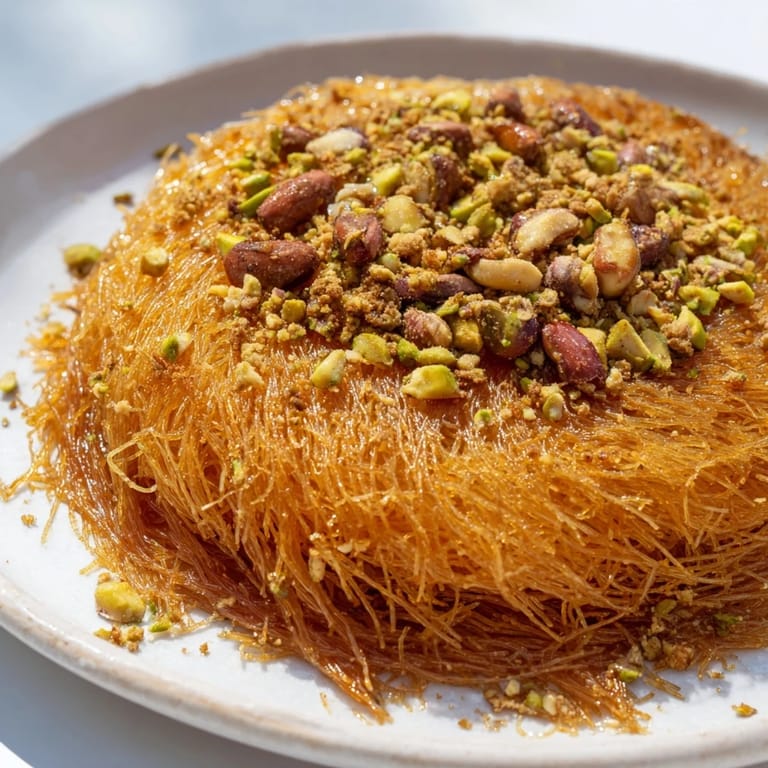
Save My first encounter with konafa happened in a Cairo kitchen on a sweltering afternoon, watching my neighbor's hands move through the shredded phyllo dough like she was conducting an invisible orchestra. The way the golden threads caught the light as they baked, the scent of butter and cinnamon filling the entire building—I knew I had to learn this. Years later, I've made it dozens of times, each batch teaching me something new about patience and the quiet magic of layers.
I made this for my study group in university, nervous because I'd only attempted it twice before. When they bit into it and went quiet for a moment—that specific quiet of genuine surprise—I understood why this dessert has survived generations. Now every time I smell the cinnamon hitting hot butter, I'm back in that tiny apartment kitchen, proud of something I'd created with my own hands.
Ingredients
- Kataifi (shredded phyllo dough): The soul of this dessert—make sure it's thawed slowly at room temperature, not rushed with heat, or it becomes impossible to separate the delicate strands.
- Unsalted butter: Use good quality butter; it's what gives the pastry that golden crispness and carries the heat into every layer.
- Walnuts, pistachios, and almonds: The trinity of Middle Eastern nuts—their combination creates complexity that no single nut can achieve alone.
- Ground cinnamon and cardamom: These spices bridge the gap between savory and sweet in a way that feels almost spiritual.
- Granulated sugar: Used both in the filling and the syrup to build layers of sweetness without overwhelming.
- Honey syrup base: The water and sugar create the foundation; the honey adds depth, lemon juice prevents cloying sweetness, and the optional rose or orange blossom water transforms it into something transcendent.
Tired of Takeout? 🥡
Get 10 meals you can make faster than delivery arrives. Seriously.
One email. No spam. Unsubscribe anytime.
Instructions
- Prepare your pan and preheat:
- Grease your 23 cm round pan generously with melted butter and slide it into a 180°C oven to heat through. A warm pan helps the bottom layer crisp evenly.
- Loosen the kataifi gently:
- This is where patience matters—use your fingertips to tease apart the shredded dough strands slowly, dividing them into two rough portions. The more separated they are, the crispier the final texture.
- Layer the first base:
- Press half the loosened kataifi into your hot pan, creating an even foundation. Don't be aggressive; let it settle naturally, then brush with half your melted butter, making sure every strand catches the heat.
- Mix and distribute the nuts:
- Combine walnuts, pistachios, almonds, sugar, cinnamon, and cardamom in a bowl. Spread this mixture evenly over your kataifi layer—the nuts should nestle between the pastry strands rather than sit on top.
- Top with the remaining kataifi:
- Layer the second half of your loosened dough gently over the nuts, then brush with the remaining melted butter. The goal is golden-brown coverage, with butter reaching all visible strands.
- Bake until golden:
- Slide into the oven for 30 to 35 minutes, watching toward the end. You're looking for a color somewhere between honey and amber, when the pastry sounds crisp when you tap it lightly.
- Make the honey syrup simultaneously:
- While the konafa bakes, combine sugar and water in a saucepan, bring to a boil, then reduce heat and let it simmer for 7 to 8 minutes. The syrup should be slightly thickened but still pourable. Remove from heat, stir in honey, lemon juice, and rose water if you're using it, then let it cool just enough that steam rises gently.
- The crucial pour:
- The moment the konafa emerges golden from the oven, pour the warm syrup evenly over the entire surface. The hot pastry absorbs the syrup while it's porous, creating that characteristic texture where the outside stays crisp but the interior becomes tender.
- Cool and cut:
- Let the konafa rest for 30 minutes at room temperature—this allows the syrup to fully set. Cut into diamonds or squares with a sharp, slightly damp knife to prevent crumbling.
 Save
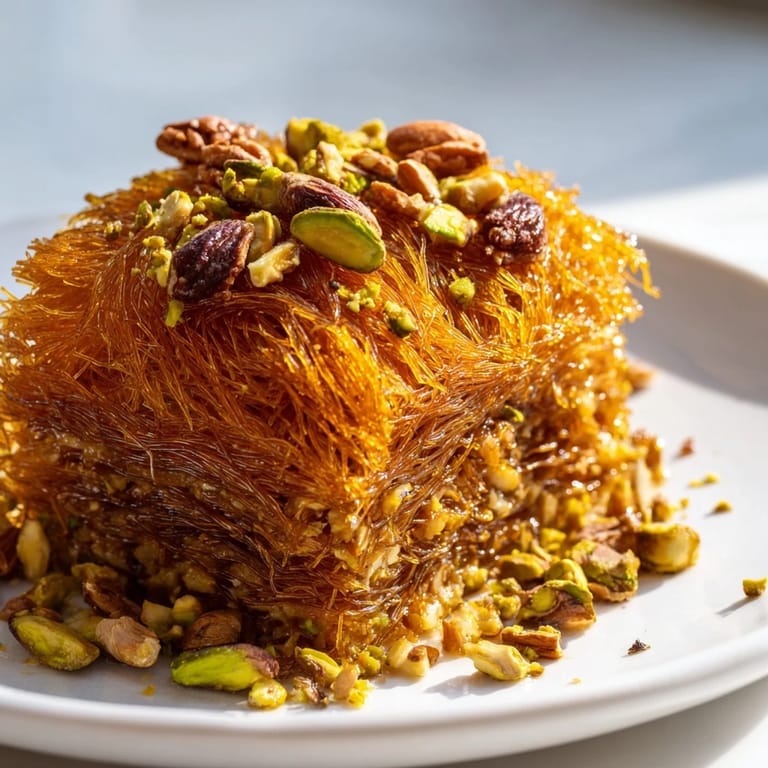
Save My mother told me that konafa was the dessert her grandmother made only for celebrations, rationing the nuts and butter like they were precious metals. Making it now, I understand—not because the ingredients are expensive, but because every bite carries intention and care. There's something about creating something that crackles and shatters that makes you feel like you've accomplished something real.
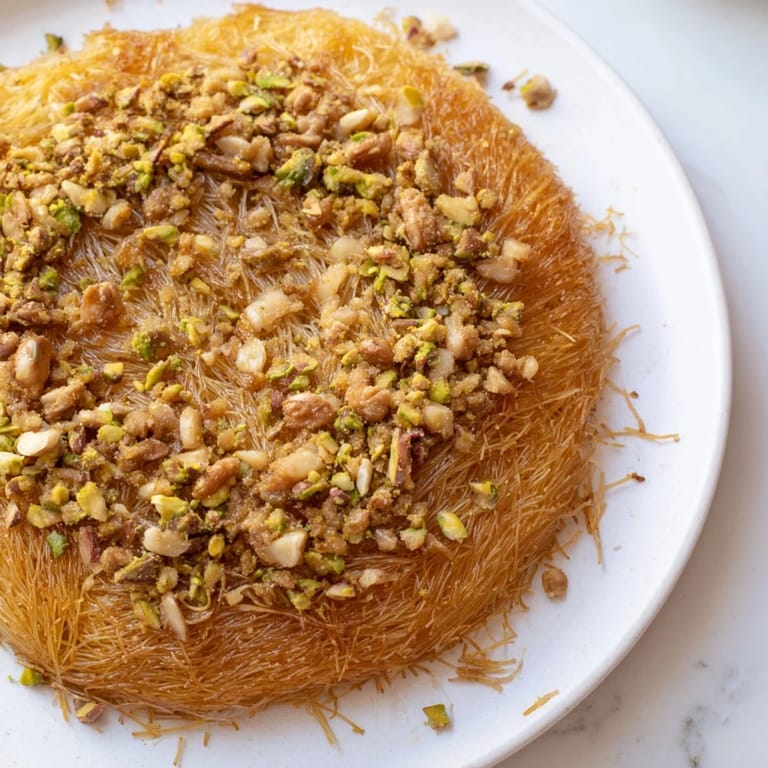
Understanding the Layers
Konafa works because of contrast—crispy against tender, spiced against sweet, nutty against buttery. The kataifi provides the structure and the textural surprise, while the nut filling adds earthiness and the honey syrup ties everything together with warmth and sweetness. Each layer serves a purpose, and they only work in concert. When you understand why each element is there, you start to see where you might experiment—perhaps with different nuts, a hint of orange zest, or a touch of clove in the filling.
Variations and Personal Touches
This recipe is forgiving in ways that surprise people—substituting hazelnuts for walnuts, swapping half the almonds for pine nuts, or adding a whisper of ground ginger to the filling all work beautifully. I've made versions with a thin layer of sweetened ricotta between the kataifi layers, and the creaminess against the crispness creates an almost decadent contrast. Some cooks add a handful of raisins plumped in orange juice to the nut mixture, which adds a subtle tartness that cuts through the sweetness elegantly.
Serving and Storage Wisdom
Konafa is best enjoyed at room temperature, when the pastry has fully set but still holds its crispness, and the syrup has cooled into the most delicate sweetness. It pairs beautifully with strong coffee or mint tea, and a dollop of thick yogurt or whipped cream on the side adds luxury. Covered loosely with a kitchen towel, it stays at its peak for two days, though honestly it rarely lasts that long once people discover it in your kitchen.
- Store in an airtight container only after it has completely cooled, or it will soften from trapped steam.
- If the pastry loses its crispness, a few minutes in a 160°C oven restores the texture beautifully.
- Make the syrup ahead of time and refrigerate it, then warm gently before pouring over freshly baked konafa.
 Save
Save Every time I make this, I'm grateful for the people who kept these recipes alive by making them, sharing them, teaching them to someone willing to listen. You're doing that now.
Recipe FAQs
- → What is the best way to prepare kataifi pastry?
Gently loosen the kataifi strands by hand to separate them before layering. This helps create an even and crisp texture when baked.
- → Can I use different nuts for the filling?
Yes, you can substitute walnuts, pistachios, or almonds with hazelnuts, cashews, or pecans depending on your preference.
- → How do I achieve the perfect honey syrup consistency?
Simmer sugar and water until slightly thickened, then stir in honey, lemon juice, and floral water. Cool slightly before pouring over hot pastry.
- → What oven temperature is ideal for baking the pastry layers?
Preheat the oven to 180°C (350°F) and bake for 30–35 minutes until the layers turn golden and crisp.
- → Are there ways to enhance the richness of this dessert?
Adding a layer of sweetened ricotta or clotted cream between the kataifi layers adds extra richness and creaminess.