 Save
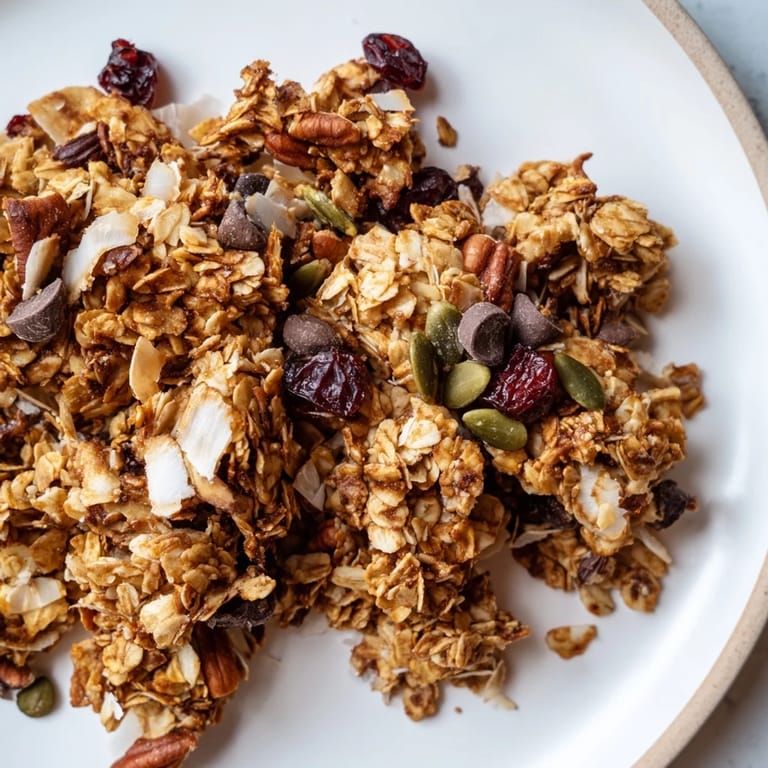
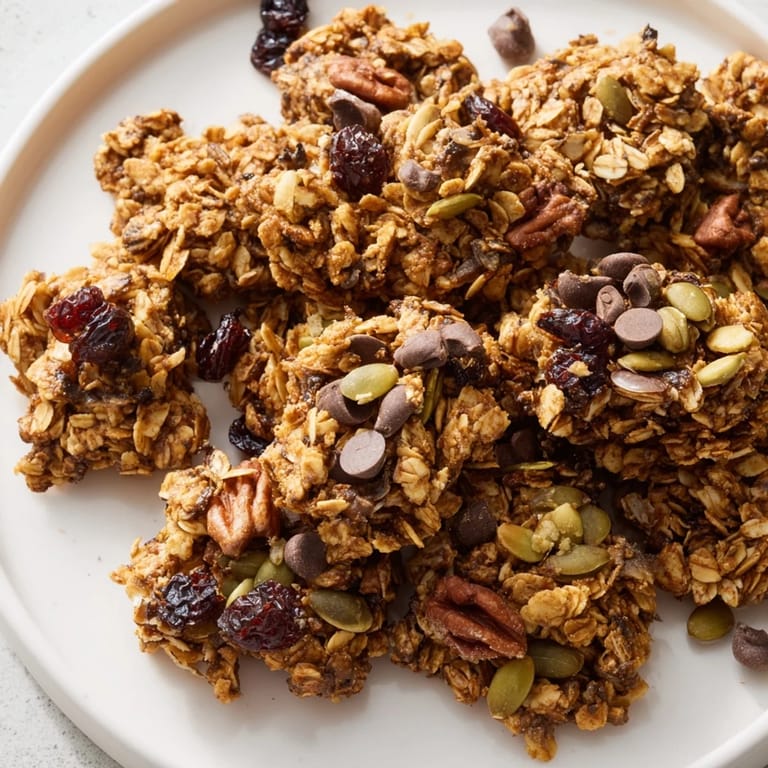
Save My kitchen smelled like a bakery every Sunday morning until I realized it was just granola. I started making it in big batches after buying yet another overpriced bag that crumbled into dust before I even got it home. Now I press the mixture down hard on the pan, let it bake untouched, and pull out these giant, craggy clusters that actually stay together. It's become the one thing I always have on hand, whether I need breakfast in a hurry or just want something sweet and crunchy to munch on while I work.
I brought a jar of this to a potluck once and three people asked for the recipe before we even sat down to eat. One friend admitted she'd been buying the fancy kind from the co op for years and couldn't believe how easy it was to make. I watched her scoop it straight from the container with her fingers while we talked, and that's when I knew it was a keeper.
Ingredients
- Old fashioned rolled oats: The backbone of any good granola, they toast up beautifully and hold the clusters together without getting mushy.
- Mixed nuts: I usually grab whatever's in the pantry, almonds, pecans, walnuts, all work, and chopping them coarsely gives you bursts of flavor in every bite.
- Shredded unsweetened coconut: Optional but worth it for that subtle tropical sweetness and extra crunch.
- Pumpkin seeds or sunflower seeds: These add a nutty depth and a satisfying snap when you bite down.
- Ground cinnamon: Just enough to make the whole batch smell like comfort without overpowering the other flavors.
- Fine sea salt: Balances the sweetness and makes everything taste more like itself.
- Honey: The glue that holds it all together and caramelizes into those golden edges I love.
- Melted coconut oil: Helps everything crisp up and adds a hint of richness.
- Vanilla extract: A small splash that ties all the flavors together and makes your kitchen smell incredible.
- Dried cranberries, raisins, or chopped dried apricots: I stir these in after baking so they stay chewy and don't turn into hard little pebbles.
- Dark chocolate chips: Not necessary, but they turn this from breakfast into dessert territory if you're in the mood.
Tired of Takeout? 🥡
Get 10 meals you can make faster than delivery arrives. Seriously.
One email. No spam. Unsubscribe anytime.
Instructions
- Preheat and prep:
- Set your oven to 325°F and line a large baking sheet with parchment paper. This keeps everything from sticking and makes cleanup a breeze.
- Mix the dry ingredients:
- Toss the oats, nuts, coconut, seeds, cinnamon, and salt together in a big bowl until they're evenly distributed. It should look like a chunky, fragrant pile ready for action.
- Whisk the wet ingredients:
- In a smaller bowl, combine the honey, melted coconut oil, and vanilla until smooth. The honey will be easier to work with if it's slightly warm.
- Coat everything:
- Pour the wet mixture over the dry ingredients and stir well, making sure every oat and nut gets coated. You'll start to see little clumps forming, which is exactly what you want.
- Spread and press:
- Dump the mixture onto your prepared baking sheet and spread it into an even layer. Use a spatula to press down firmly, this is the secret to getting those big, beautiful clusters.
- Bake until golden:
- Slide the pan into the oven and bake for 22 to 25 minutes, rotating it halfway through so everything browns evenly. You're looking for a deep golden color and a toasty aroma.
- Cool completely:
- Pull the pan out and resist the urge to stir or break it up. Let it sit undisturbed on the baking sheet until it's completely cool, this is when the clusters harden and set.
- Break and mix:
- Once cooled, break the granola into chunks and toss in any dried fruit or chocolate chips. Transfer to an airtight container and try not to eat it all in one sitting.
 Save
Save There's something about pulling a tray of golden granola out of the oven that makes me feel like I've actually accomplished something, even on days when nothing else goes right. It's simple, forgiving, and always delivers. I keep a jar on the counter now, and every time I reach for a handful, I'm reminded that the best things in the kitchen don't have to be complicated.
How to Store Your Granola
I learned the hard way that leaving granola in an open container turns it soft and sad within a day. Now I seal it up tight in a glass jar or an airtight container as soon as it cools. It stays crunchy for up to three weeks at room temperature, though it rarely lasts that long in my house. If you want to keep it even longer, toss it in the freezer and it'll stay fresh for months.
Serving Ideas That Actually Work
I used to just pour milk over mine like cereal, but then I started layering it with yogurt and fresh berries for a quick parfait that feels fancy without any effort. It's also perfect sprinkled over oatmeal for extra texture, or eaten straight from the jar when you need a snack that won't leave you hungry an hour later. Sometimes I crumble it over vanilla ice cream and pretend it's a deconstructed dessert.
Making It Your Own
The beauty of this recipe is that you can swap almost anything and it still works. I've made it with maple syrup instead of honey, thrown in whatever nuts were on sale, and even added a pinch of cardamom once when I was feeling adventurous. The base stays the same, but the little tweaks make it feel new every time.
- Try adding a tablespoon of chia or flax seeds for extra nutrition and crunch.
- Swap the cinnamon for pumpkin pie spice or a pinch of nutmeg if you want a warmer flavor.
- Use cashews and dried mango for a tropical twist that tastes like vacation.
 Save
Save Once you make granola at home, the store bought stuff just doesn't cut it anymore. You'll have clusters that actually hold together, flavors you chose yourself, and a kitchen that smells like you know what you're doing.
Recipe FAQs
- → How do I prevent my granola from becoming too hard?
The key is to let the granola cool completely on the baking sheet without stirring. This allows the clusters to set properly. Store in an airtight container to maintain crunchiness and prevent moisture from making it chewy.
- → Can I substitute honey with another sweetener?
Yes, maple syrup works excellently as a 1:1 replacement and makes the granola vegan-friendly. You can also use agave nectar or brown rice syrup, though the texture and flavor may vary slightly.
- → What's the best way to store homemade granola clusters?
Store cooled clusters in an airtight container at room temperature for up to two weeks. Keep dried fruits and chocolate chips separate until serving to prevent them from softening. For longer storage, freeze in an airtight container for up to three months.
- → How can I customize the nuts and seeds in this?
Feel free to swap or mix different nuts like hazelnuts, cashews, or macadamia nuts. For seeds, try pumpkin, sunflower, chia, flax, or sesame seeds. Keep the total amount at one cup to maintain proper binding and texture.
- → Is it necessary to rotate the pan while baking?
Yes, rotating the pan halfway through baking ensures even browning and prevents over-toasting on one side. Most ovens have hot spots, so rotation helps achieve consistent golden color throughout.
- → Can I make this dairy-free or vegan?
This granola is naturally vegan when you use maple syrup instead of honey and opt for coconut oil. All other ingredients are plant-based, making it suitable for vegan diets. Just verify that your oats are certified gluten-free if needed.