 Save
Save The first time I made knafeh, my kitchen filled with the most intoxicating aroma—butter and honey mingling with orange blossom in a way that made everyone who walked by stop and ask what was cooking. I'd watched my neighbor prepare it for Eid, mesmerized by how she worked the shredded pastry like spun gold, and I knew I had to learn. That warm, stretchy cheese pulling apart on the fork, the crispy phyllo shattering between my teeth—it became my obsession to recreate that magic in my own oven.
I'll never forget serving this to my book club—they arrived expecting something modest, and when I set that golden, glistening knafeh in the center of the table and inverted it with (admittedly shaky) confidence, the silence was worth every minute of prep work. Someone asked for the recipe before they'd even finished their first bite, and suddenly I was the person known for making knafeh, which is honestly the best kind of kitchen reputation to have.
Ingredients
- Akawi cheese (400 g): This is the heart of knafeh—its mild, slightly salty flavor and ability to stretch when warm make it irreplaceable, though low-moisture mozzarella works in a pinch if you soak it first to remove excess salt.
- Ricotta cheese (200 g): Adds creaminess and prevents the filling from becoming too dense; don't skip this, as it's what gives knafeh its signature texture.
- Kataifi dough (250 g): Those impossibly fine shreds of phyllo are what make this dessert distinctive—thaw them gently and keep them loose so they crisp up properly.
- Unsalted butter (100 g), melted: The butter coats every strand and ensures that crackling, golden crust that everyone comes back for.
- Granulated sugar (250 g): Mixed with water and lemon juice to create the syrup base that keeps knafeh moist without making it soggy.
- Orange blossom water (1 tbsp): This is where the magic happens—it's floral, delicate, and unmistakably Middle Eastern; use a good quality version, as cheaper ones can taste soapy.
- Rose water (1 tbsp): Complements the orange blossom and adds another layer of aromatic complexity that makes people ask what that heavenly smell is.
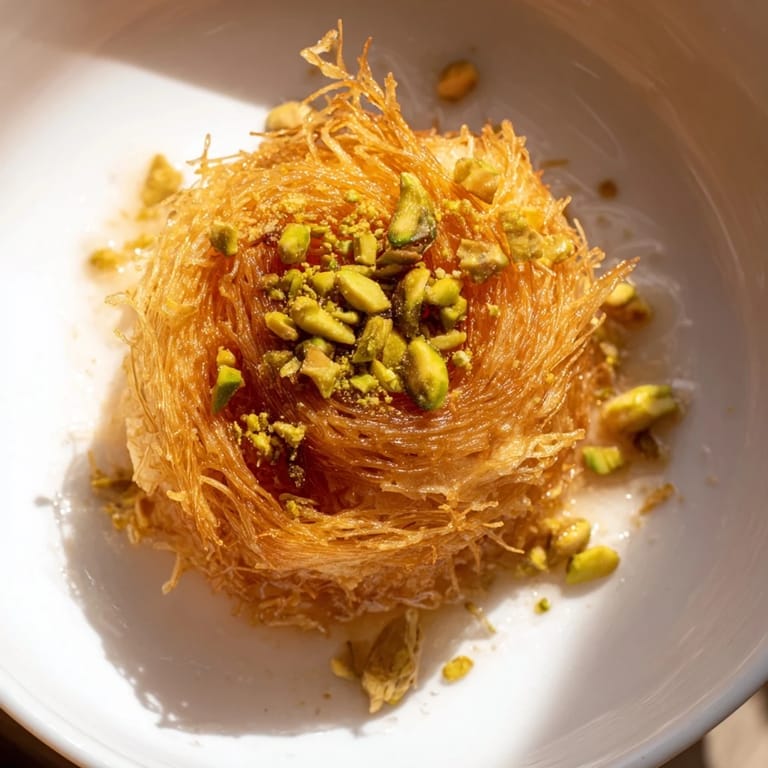
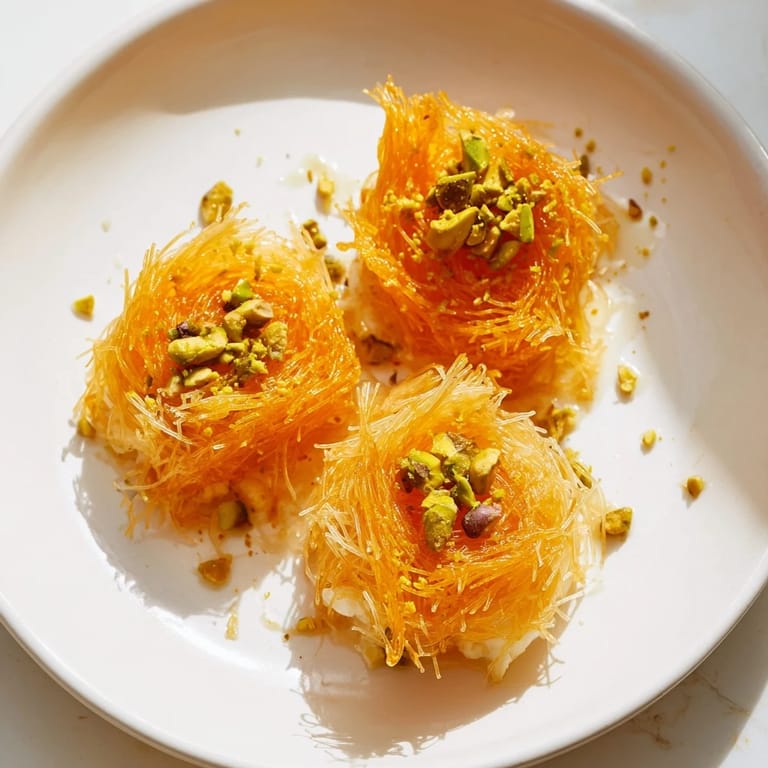
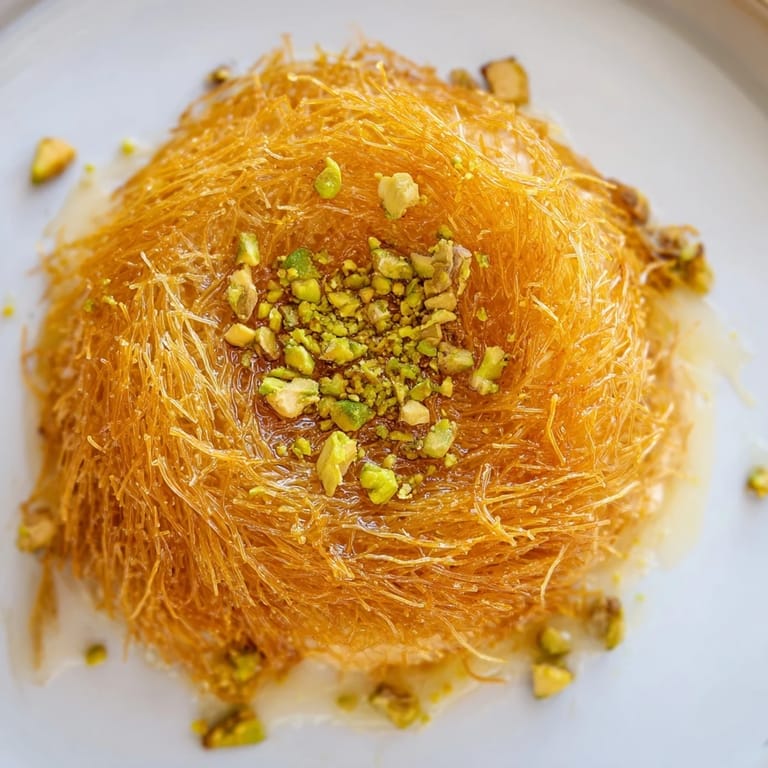
- Pistachios (2 tbsp), finely chopped: Scattered on top for color, crunch, and that gorgeous green contrast against the golden pastry.
- Honey (1 tbsp, optional): A final drizzle that catches the light and adds a touch more sweetness if desired.
Tired of Takeout? 🥡
Get 10 meals you can make faster than delivery arrives. Seriously.
One email. No spam. Unsubscribe anytime.
Instructions
- Prepare the cheese, the foundation:
- If using Akawi, soak it in cold water for several hours (or overnight, changing the water hourly) to reduce its salt content—this step is crucial and makes the difference between inedible and divine. Drain and pat completely dry, then shred or slice thinly, and combine with the ricotta in a bowl, stirring gently to keep it from becoming paste-like.
- Butter the pastry like you're tucking it in:
- Place your thawed kataifi in a large bowl, gently separate the strands with your fingers so they don't clump, then drizzle the melted butter over them slowly while tossing with your hands until every thread glistens. This is meditative work—take your time and make sure nothing's left dry.
- Build the bottom layer, your crispy foundation:
- Grease your 23 cm round baking dish well, then spread half the buttered kataifi evenly across the bottom, pressing down gently but firmly to create a solid base that'll hold the cheese without falling apart.
- Spread the cheese with a gentle hand:
- Distribute the cheese mixture evenly over the pastry base, leaving a tiny margin at the edges so the phyllo can crisp up all around. This layer is forgiving—don't overwork it, just spread it like you're icing a cake.
- Crown it with the remaining pastry:
- Top with the rest of the buttered kataifi, spreading it evenly and pressing down just enough so it holds together during baking but stays light and airy. You want it compacted enough to be stable, not so much that it becomes dense.
- Bake until golden and crackling:
- Pop it into a preheated 180°C oven for 30–35 minutes, watching as the top transforms from pale to deep golden brown and starts to smell like toasted honey and butter. The moment it's deeply golden and sounds crispy when you tap it, it's ready.
- Make the syrup while it bakes:
- In a saucepan, combine sugar, water, and lemon juice, bring to a boil, then let it simmer gently for 8–10 minutes until it thickens just slightly and coats the back of a spoon. Remove from heat and stir in the orange blossom and rose water, letting the syrup cool completely—you want it room temperature when it hits the hot knafeh for that perfect soak.
- The dramatic flip, the moment of truth:
- Let the knafeh cool for just 2–3 minutes (any longer and it becomes difficult to invert), place a serving platter over the baking dish, take a breath, and flip it in one confident motion. The crispy side is now on top—gorgeous and golden and ready for its syrup bath.
- Soak it with care:
- Pour half the cooled syrup evenly over the hot knafeh, watching as it absorbs slowly and the dessert drinks in all that floral sweetness. The heat of the pastry matters here—it opens up the pastry's texture and lets the syrup penetrate.
- Finish with a flourish:
- Scatter your chopped pistachios over the top and add a drizzle of honey if you're feeling fancy—serve it warm, with extra syrup on the side for those who want more.
 Save
Save There's something profound about a dessert that brings people together, that makes a table go quiet with appreciation. Knafeh does that—it's showstopping enough for celebrations but comforting enough to make on a random Thursday, and somehow it always tastes like someone spent hours when really you've just orchestrated a beautiful layering of simple ingredients.
Why Temperature Matters More Than You'd Think
Knafeh is all about temperature play—the hot pastry, the cool syrup, the cold cheese starting to melt. I used to bake mine and then let it cool completely before adding syrup, wondering why it felt dense and heavy, until I realized the magic happens when the hot pastry is still steaming and ready to drink in that floral liquid. Now I time it perfectly, and the difference is night and day.
The Syrup Is Not an Afterthought
I used to rush the syrup, boiling it for two minutes and pouring it hot over the knafeh—disaster. The syrup needs time to reduce slightly and cool so it soaks in rather than slides off, and those flower waters need to be added after the heat has been removed so their delicate flavors don't cook away. It's the difference between knafeh that's crispy and moist, and knafeh that's either soggy or parched.
Serving and Storage Secrets
Knafeh is best served warm, straight from the oven if you can manage it, though I've had great success making it a few hours ahead and reheating it gently in a low oven just before serving—it refreshes beautifully and the flavors actually deepen slightly as it sits. Pair it with strong Turkish coffee or mint tea to cut through the sweetness, and have extra syrup on hand because someone will always ask for more.
- Store any leftovers covered at room temperature for up to two days, and reheat gently in a 160°C oven to restore crispness.
- If you want an extra-crunchy top, broil it for 1–2 minutes after baking, but watch it like a hawk because it burns fast.
- Make the syrup up to a day ahead and keep it chilled—it actually develops better flavor when it sits.
 Save
Save Every time I make knafeh, I'm reminded that the best desserts aren't about complexity—they're about respecting each ingredient and understanding how they transform together. This one has earned its place at every celebration I host.
Recipe FAQs
- → What cheeses work best for knafeh filling?
Akawi cheese is traditional, offering a salty and stretchy texture, but unsalted mozzarella or ricotta can be excellent substitutes for mildness and creaminess.
- → How can I get the kataifi pastry crispy?
Coating the kataifi strands thoroughly with melted butter before baking helps achieve a golden, crisp texture that contrasts the creamy filling.
- → How is the honey syrup prepared and used?
The syrup combines sugar, water, lemon juice, and floral waters, simmered until slightly thickened. It is poured over the hot pastry right after baking to soak in flavor.
- → Can knafeh be made ahead of time?
For best texture, it is recommended to serve knafeh immediately after baking. However, it can be briefly reheated or broiled to regain crispness if prepared earlier.
- → What garnishes complement knafeh?
Chopped pistachios and a light drizzle of honey add color, texture, and sweetness enhancing both appearance and flavor.